Published on:
 Modified on:

 Reading Time: 5 min
 Abdominoplasty
A tummy tuck (abdominoplasty) always creates a scar, but its location, appearance and long-term outcome depend heavily on incision type, skin quality, healing behaviour and surgical technique. Understanding how tummy tuck scars form, how they evolve over time and how to optimize healing helps patients achieve the most discreet, smooth result possible.
 Table of Contents:
-
1
 What causes a tummy tuck scar and where it is placed?
-
2
Factors that influence how your abdominoplasty scarring forms
-
3
Types of tummy tuck scars explained
-
4
Tummy tuck scar healing stages: What’s normal and what isn’t?
-
5
Tummy tuck scar before and after: What to expect
-
6
How to minimise a tummy tuck scar: Home care + professional treatments
-
7
When to start scar treatment after surgery
In this article, you’ll learn how tummy tuck scars form, how incision type and healing behaviour influence their appearance and why some scars fade better than others. We explain scar placement, types and healing stages step by step, clarify what’s normal versus when treatment is needed and outline how scars typically evolve from 6 months to 5 years. You’ll also discover proven home care and professional treatments, plus when to start them for the most discreet long-term result.
What causes a tummy tuck scar and where it is placed?
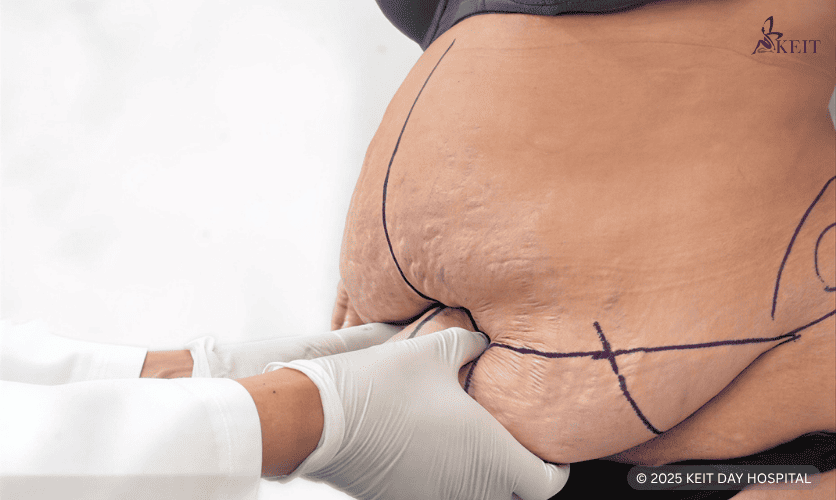
A tummy tuck scar forms as a result of the incision required to remove excess skin and tighten the abdominal wall. The surgeon strategically places this incision low on the abdomen so it can be hidden within underwear or the bikini line. Depending on the type of abdominoplasty performed, scar length and placement vary:
- Full tummy tuck: A long, low horizontal scar extending from hip to hip, positioned low enough to sit inside underwear.
- Mini tummy tuck: A shorter scar limited to the central lower abdomen, similar to an extended C-section scar.
- Circumferential tummy tuck / 360° body lift: A scar that wraps around the entire waistline, used in massive weight-loss patients.
For a complete medical overview of how abdominoplasty is performed, including incision types, muscle repair and expected results, you can read our article on tummy tuck procedure and results.
Factors that influence how your abdominoplasty scarring forms
Not every abdominal scar heals the same way. Several factors determine how noticeable the scar becomes over time:
- Skin type and genetics: Some patients naturally form thicker or more pigmented scars.
- Age: Younger patients may scar more aggressively, while older patients often have softer scar formation.
- Tension on the incision: Higher tension leads to wider or more raised scars.
- Post-operative swelling: Excess inflammation can delay healing and affect scar texture.
- Smoking and poor circulation: These reduce oxygen supply and increase the risk of poor scarring.
- Aftercare compliance: Silicone therapy, massage and proper taping directly influence scar quality.
- Surgeon technique: Low placement, minimal tissue trauma and correct closure depth are essential for thin, smooth scars.

Types of tummy tuck scars explained
While incision patterns determine where the scar sits, the type of scar tissue depends on how your body heals. The three main scar types include:
- Linear scar: Flat, thin and pale over time, remaining the ideal result.
- Hypertrophic scar: Raised, firm and red, but stays within the incision line.
- Keloid scar: Thick, overgrown scar that extends beyond the incision border and are more common in darker skin tones.
Identifying your scar type early helps guide appropriate treatment and prevent long-term visibility.
Tummy tuck scar healing stages: What’s normal and what isn’t?
During the scar healing process, abdonioplasty scarring goes through predictable changes, but it’s important to distinguish normal scar maturation from signs that may indicate a healing complication.
Normal scar healing signs
- Week 1–2: Redness, swelling, tightness, mild scabbing.
- Month 1: Scar turns darker or pink.
- Month 3: Scar may look thicker or firmer, a normal maturation phase.
- Month 6: Colour gradually fades, texture softens.
- 1–2 years: Scar settles into a flat, pale line.
Scar healing signs which are not normal
Most abnormal tummy tuck scar changes require treatment, but some need faster intervention. Hypertrophic and keloid scars almost always require medical management because they can thicken or grow over time. Significant pigment changes may need targeted therapy if they don’t fade naturally. Widened scars and persistent “dog ears” rarely improve on their own and often require correction. Ongoing swelling, hardness or nodules should be assessed early, and any infection-related scarring demands immediate treatment to prevent long-term damage.
Tummy tuck scar before and after: What to expect
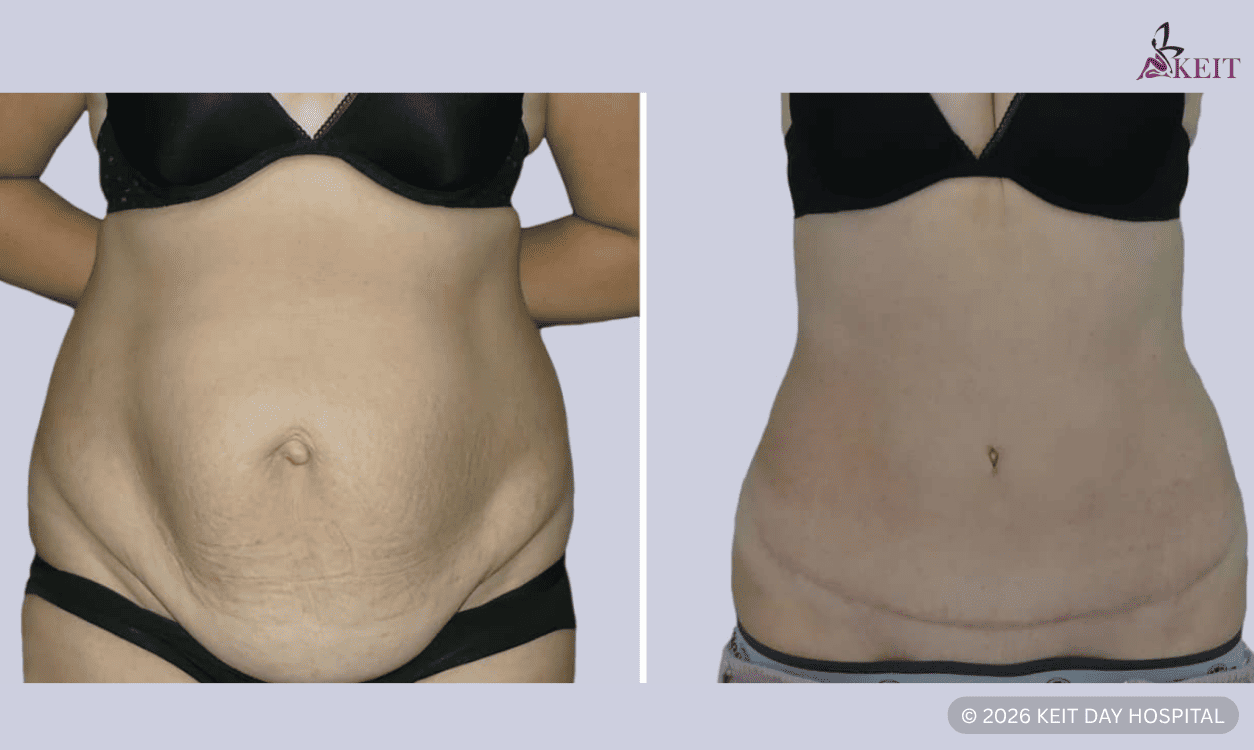
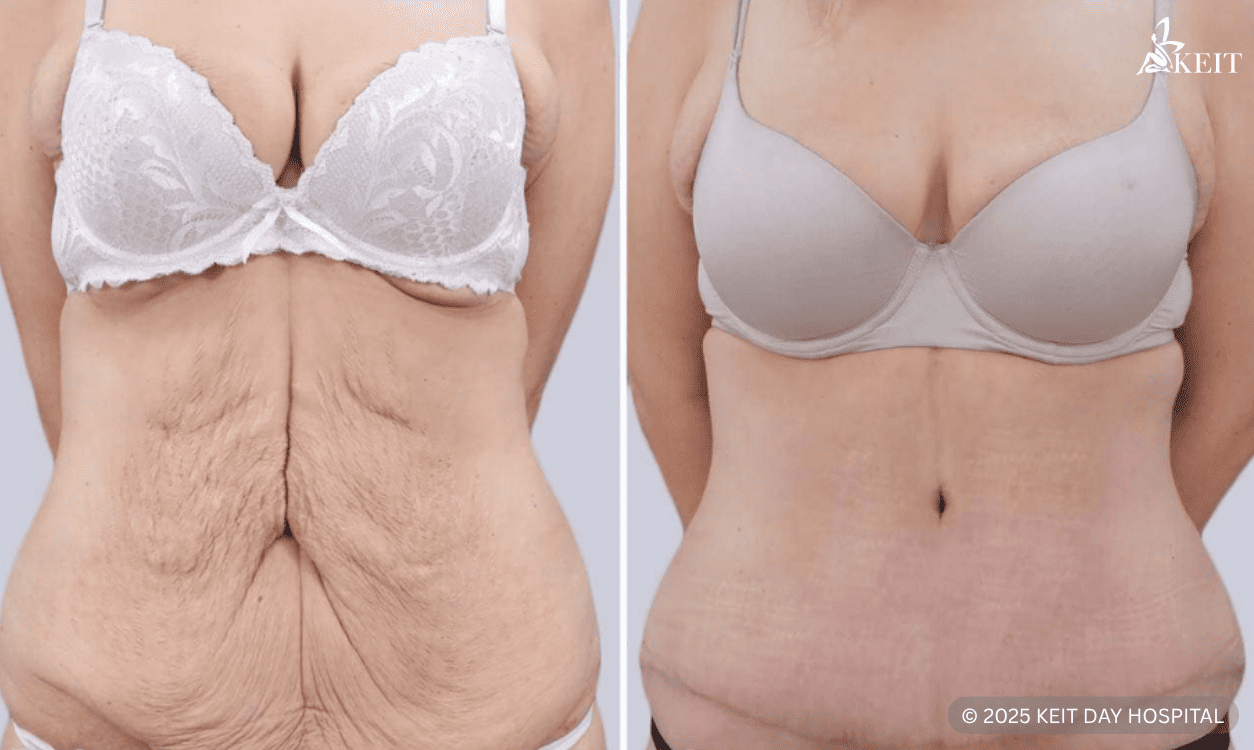
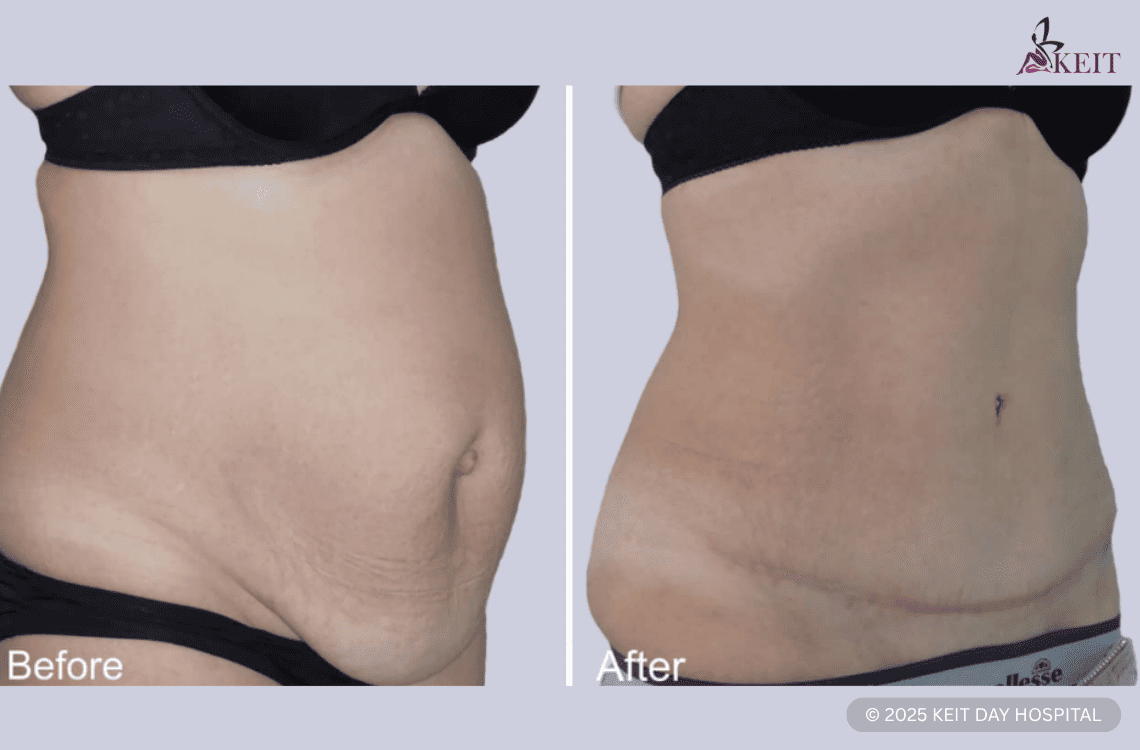
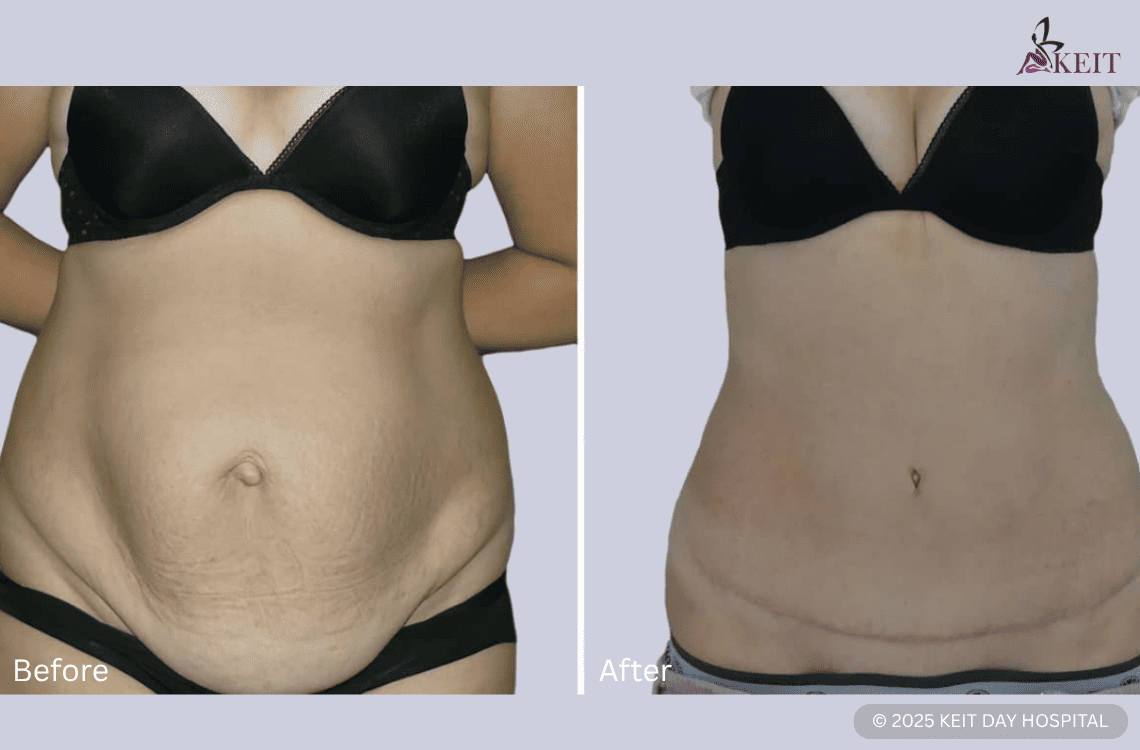
Abdominal scars evolve gradually over time, with noticeable improvements in texture, colour, and visibility as healing progresses year after year.
- Tummy tuck scar after 6 months: The scar is still maturing. It may appear firm, slightly raised, or pink/red, but collagen remodelling is actively underway and early fading usually begins.
- Tummy tuck scar after 1 year: The scar is usually flatter and lighter but may still show mild redness or firmness.
- Tummy tuck scar after 2 years: Colour fades significantly and many scars blend smoothly with surrounding skin.
- Tummy tuck scar after 3 years: Most scars reach their final appearance: thin, flat and skin-coloured.
- Tummy tuck scars after 5 years: Scars typically become barely visible for most patients unless hypertrophic or keloid tendencies are present.
How to minimise a tummy tuck scar: Home care + professional treatments
Proper at-home scar care plays a key role in how scars on abdomen heal, fade and soften over time, especially during the first year after surgery.
- Silicone sheets or silicone gel (gold standard).
- Scar massage starts when the surgeon approves.
- Silicone scar tape for tension control.
- Topical treatments such as vitamin E, onion extract, niacinamide.
- SPF 50+ daily for at least 12 months
Professional treatments for tummy tuck scars
When scars remain raised, pigmented, or slow to improve, in-clinic treatments can significantly enhance scar texture, colour and overall appearance under medical supervision.
- Laser therapy: Used on mature scars to reduce redness and improve texture.
- Microneedling / RF microneedling: Helps soften scars and improve skin quality.
- Steroid injections: Used for raised or hypertrophic scars to flatten them.
- Surgical scar revision: For wide or poorly positioned scars after full healing.
- Medical tattooing: Camouflages colour differences once scars are stable.
A personalized treatment plan improves predictability and speeds up scar maturation.
When to start scar treatment after surgery
Timing is essential for effective care regarding surgical scars in abdomen:
- Week 1–2: Keep the incision protected and clean. Do not massage yet.
- Week 3–4: Begin silicone therapy if the incision is fully closed.
- Week 4–6: Start gentle massage (if approved by the surgeon).
- Month 3+: Introduce laser treatments, microneedling or steroid injections for problematic scars.
- Months 6–12: Continue silicone and sun protection to optimize fading.
- Starting too early or too aggressively can worsen the scar, so professional guidance is key.